If you’ve ever run out of grout mid-backsplash or realized you painted over the wrong wall, it’s time to upgrade your approach. Enter the DIY project planner—a simple but game-changing tool that turns chaos into completion. Whether you’re renovating a bathroom, building a deck, or just refreshing your laundry room, a solid plan saves time, money, and frustration.
Let’s break down why every DIYer should build a plan before picking up a hammer—and how to create one like a pro.
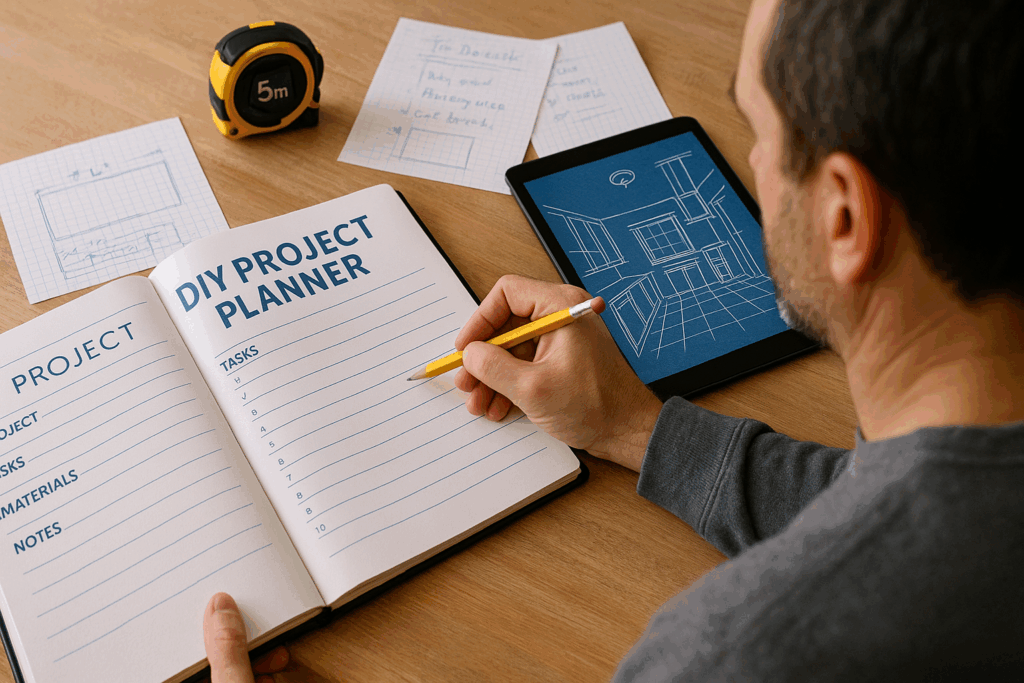
What Is a DIY Project Planner?
Blueprint Meets To-Do List
A DIY project planner is more than a checklist. It’s a customized guide to your project that includes:
- Goals and desired outcomes
- Material and tool lists
- Budget and timeline tracking
- Step-by-step instructions
- Space for measurements, sketches, and photos
Think of it as your personal renovation roadmap—complete with detour options and supply pit stops.
Why Planning Beats Winging It
Avoid the “Oops” Moments
Jumping into a project without planning leads to classic DIY mistakes:
- Buying too much or too little material
- Missing a critical prep step (hello, wall anchors)
- Forgetting permits or code requirements
- Underestimating the budget or time needed
With a project planner, you’re working smart—not just hard.
Key Elements of a Rock-Solid DIY Planner
1. Define the Project Scope
Start with the what and why:
- What are you trying to accomplish?
- Is this a repair, upgrade, or total transformation?
- What’s the budget limit (in both USD and approximate metric equivalent)?
Write this down. It sets the tone and keeps you on track when Pinterest starts whispering expensive ideas.
2. Measure Twice, Cut Once
Include a detailed measurements section in your planner:
- Wall lengths and ceiling heights (feet/inches and meters/centimeters)
- Fixture sizes
- Appliance clearances
- Material coverage (tile, paint, flooring)
Use a laser measurer and jot everything into your planner or app.
3. Break It into Phases
Create a timeline based on project stages:
- Demo
- Prep
- Build
- Finish
- Cleanup
Assign realistic time blocks to each. For example: “Tile backsplash—4 hours (plus 12-hour dry time).”
Include buffer days. DIY time is never 100% accurate.
4. Tools & Materials Checklist
Your planner should include two checklists:
- Tools You Own
- Tools or Materials to Buy
This prevents the all-too-familiar “three trips to the store in one afternoon” disaster.
Pro Tip: Always check your materials for damage before the project start date.
5. Sketch It Out
Visuals matter. Even a rough pencil sketch or phone snapshot helps when shopping or troubleshooting.
Include:
- Before photos
- Sketches of layout
- Photos of product labels or inspiration
This section becomes especially helpful when talking to a pro or checking code requirements.
Go Digital or Old School?
You can download printable DIY project planner templates, use spreadsheet trackers, or go fully digital with apps like:
- ChillDIY.com
- Canva (for design-forward templates)
Want something physical? A project-dedicated notebook or binder works perfectly—just add plastic sleeves for receipts and measurements.
Bonus: Keep the Planner for Next Time
Finished the job? Don’t toss the planner. It becomes a reference manual for future projects. You’ll remember:
- How much tile you used for 40 sq ft (3.7 sq meters)
- Which caulk didn’t crack in your humid bathroom
- That the laser level was totally worth it
Conclusion: Plan It. Crush It.
The DIY project planner isn’t just for perfectionists—it’s for anyone who wants to finish smarter, faster, and with fewer headaches. Whether you’re doing a full remodel or a quick fix, planning gives you control over every nail, screw, and swipe of paint.
Ready to crush your next project? Grab your planner, sketch it out, and make it happen.